This guide is an update to "Creating a custom Linux distribution for an ARM® Cortex®-A9 based SBC" and provides directions for building a GNU/Linux BSP for the RioTboard (
Internet of Things) with Yocto 1.8 on a 64-bit Fedora 21 GNU/Linux host. The latest stable version of Yocto 1.8 has been incorporated along with build instructions for version 4.0.7 of the GNU/Linux kernel with i.MX 6 patches, U-boot, audio recording and playback support, and a full kernel and application development environment on the target.
This guide is split into three parts as follows.
I. Creating a custom Linux BSP for the RioTboard (Internet of Things) with Yocto 1.8- Part I- Hardware and software prerequisites.
- Required Packages for a 64-bit Fedora 21 Host development system.
II. Creating a custom Linux BSP for the RioTboard with Yocto 1.8 - Part II
- Pull the Freescale community BSP platform source code from github.
- Setup the build environment using the predefined imx6dl-riotboard machine.
- Create a new layer for the custom Linux distribution.
- Customize the image in the meta-bsec layer.
- Create layer.conf file in the meta-bsec layer.
- Create the distribution configuration file in the meta-bsec layer.
- Add the new layer to bblayers.conf.
- Customize the local configuration.
- Execute the build.
III. Creating a custom Linux BSP for the RioTboard with Yocto 1.8 - Part III- Write the GNU/Linux BSP image to an SD card.
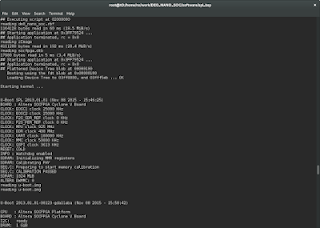
- Set the physical switches on the RioTboard to boot from the uSD or SD card.
- Connect the target to the necessary peripherals for boot.
- Test audio recording, audio playback, and Internet connectivity.
The BSP will consist of a GNU/Linux 4.0.7 kernel, an EXT3 root filesystem, and the U-Boot bootloader. All components will be compiled from the latest, public sources. The GNU/Linux system will include support for audio recording and playback via the RioTboard's MIC In and Audio Out jacks. Support will be built for ethernet, ipv4, bluetooth, USB host and USB gadget, and an ssh server. The final target image will also contain native ARM compilers, a full SDK, strace, GDB, package management tools, and the GNU/Linux 4.0.7 kernel source code with i.MX 6 patches already applied.
In the first guide for Yocto 1.7, a custom distribution and target image was created by extending the core-image-minimal image. In this guide, a custom distribution and target image will be created by extending the core-image-full-cmdline image. The resulting target image will be larger in size but will include a much richer set of features for kernel and application level development and debugging on the target.
Finally, Yocto will be configured so that all source packages are archived in their original format with accompanying license files.
To start with, please read
Setting up an ARM® Cortex®-A9 based SBC which outlines the necessary components to get started. A microphone and a set of powered speakers will be needed, both with 3.5mm connectors. An Audio-Technica ATR4650 microphone and a pair of Logitech S-00134 powered speakers will be onnected to the RioTboard. These will be needed for testing audio recording and playback.
1. Hardware and software prerequisites
Host Operating System
Fedora release 21 for x86_64
GNU/Linux kernel 4.0.7-200.fc21.x86_64 #1 SMP
Host Hardware
Intel(R) Core(TM) i7-4600U CPU @ 2.10GHz
Physical Memory 12 GB
My /home partition is 414 GB and resides on a solid state hard drive.
The Yocto build requires a large amount of space so it is recommend keeping a scratch area in the /home partition of at least 100 GB.
2. Required Packages for a 64-bit Fedora 21 Host development system
from the Yocto Project Mega Manual Revision 1.8Execute the following commands on the host.
 host]$ sudo yum install gawk make wget tar bzip2 gzip python unzip perl patch \
        diffutils diffstat git cpp gcc gcc-c++ glibc-devel texinfo chrpath \
        ccache perl-Data-Dumper perl-Text-ParseWords perl-Thread-Queue socat \
        findutils which
 host]$ sudo yum install SDL-devel xterm perl-Thread-Queue
 host]$ sudo yum install make docbook-style-dsssl docbook-style-xsl \
        docbook-dtds docbook-utils fop libxslt dblatex xmlto xsltproc
 host]$ sudo yum install autoconf automake libtool glib2-devel
In Part II, the source code for the kernel, boot loader, and root file system packages will be pulled. All components will then be built from source and the GNU/Linux BSP image will be created for the target.
Continue to Part II