Wednesday, October 28, 2015

The "Three Fives" Discrete 555 Timer Kit

The NE555 timer IC is a classic and widely used component in electronic circuits, so building a transistor-scale replica of it is a great way to understand how it works at a fundamental level. It's also a good way to develop your soldering skills and learn how to use an oscilloscope to measure signals in a circuit.

I picked up a "Three Fives" Discrete Timer Kit this weekend. As it turns out the kit was well worth the money. The "Three Fives" Discrete Timer Kit is a transistor-scale replica of the NE555 timer IC. The printed circuit board (PCB) is high-quality and soldering the transistors and resistors was alot of fun. Thanks to Eric Schlaepfer and Evil Mad Scientist Labs for this high quality circuit kit.

The size of the board makes it easy to measure what's going on inside the circuit. Just connect the probes from an oscilloscope to any of the solder or test points on the board.

A photo of the board that I built is below. I also wired a sample test circuit for blinking a pink LED and then connected a scope to the board so that I could look at the square wave.


Thursday, July 16, 2015

Creating a custom Linux BSP for an ARM Cortex-A9 SBC with Yocto 1.8 - Part III

In part III of this guide, the installation of the final image to the SD card will be covered.  The SD card will then be booted on the target.  Finally, audio recording and playback will be tested.

Part III of this guide consists of the following sections.

  1. Write the GNU/Linux BSP image to an SD card.
  2. Set the physical switches on the RioTboard (Internet of Things) to boot from the uSD or SD card.
  3. Connect the target to the necessary peripherals for boot.
  4. Test audio recording, audio playback, and Internet connectivity.

1.  Write the GNU/Linux BSP image to an SD card

At this point, the build should be complete, without errors.  The output should be as follows.


 real 254m28.335s
user 737m9.307s
sys 133m39.529s

Insert an SD card into an SD card reader, connect it to the host, and execute the following commands on the host.


 host]$ cd $HOME/src/fsl-community-bsp/build /tmp/deploy/images/imx6dl-riotboard
host]$ sudo umount /dev/sd<X>
host]$ sudo dd if=bsec-image-imx6dl-riotboard.sdcard of=/dev/sd<X> bs=1M
host]$ sudo sync


2. Set the physical switches on the RioTboard to boot from the uSD or SD card.


For booting from the SD card on the bottom of the target, set the physical switches as follows.
SD (J6, bottom) 1 0 1 0 0 1 0 1

For booting from the uSD card on the top of the target, set the physical switches as follows.
uSD (J7, top) 1 0 1 0 0 1 1 0

3. Connect the target to the necessary peripherals for boot.

There are two options

Option 1

Connect one end of an ethernet cable to the target. Connect the other end of the ethernet cable to a hub or DHCP server.  

Connect the board to the host computer via the J18 serial UART pins on the target.  This will require a serial to USB breakout cable.  Connect TX, RX, and GND to RX, TX, and GND on the cable. The cable must have an FTDI or similar level shifter chip. Connect the USB end of the cable to the host computer.

Connect the speakers to the light green 3.5 mm audio out jack and the microphone to the pink 3.5 mm MIC In jack.

Connect a 5V / 4 AMP DC power source to the target.

Run minicom on the host computer. Configure minicom at 115200 8N1 with no hardware flow control and no software flow control. If a USB to serial cable with an FTDI chip in it is used, then the cable should show up in /dev as ttyUSB0 in which case, set the serial device in minicom to /dev/ttyUSB0.

If this option was chosen, drop into U-boot after power on by pressing Enter on the host keyboard with minicom open and connected.

If enter is not pressed after power-on, the target will boot and a login prompt will appear.

A login prompt will not appear.

Option 2

Connect one end of an ethernet cable to the target. Connect the other end of the ethernet cable to a hub or DHCP server.  

Connect a USB keyboard, USB mouse, and monitor (via an HDMI cable) to the target.

Connect the speakers to the light green 3.5 mm audio out jack and the microphone to the pink 3.5 mm MIC In jack.

Connect a 5V / 4 AMP DC power source to the target.

A login prompt will now appear.

4. Test audio recording, audio playback, and Internet connectivity


Type root to log in to the target. The root password is not set.

Execute the following commands on the target

 root@imx6dl-riotboard: alsamixer 

Press F6.
Press arrow down so that 0 imx6-riotboard-sgtl5000 is highlighted.
Press Enter.
Increase Headphone level to 79<>79.
Increase PCM level to 75<>75.
Press Tab.
Increase Mic level to 59.
Increase Capture to 80<>80.
Press Esc.

 root@imx6dl-riotboard: cd /usr/share/alsa/sounds
root@imx6dl-riotboard: aplay *.wav

A sound should be played through the speakers.

 root@imx6dl-riotboard: cd /tmp
root@imx6dl-riotboard: arecord -d 10 micintest.wav

Talk into the microphone for ten seconds.

 root@imx6dl-riotboard: aplay micintest.wav

A recording should play through the speakers.

 root@imx6dl-riotboard: ping riotboard.org

An ICMP reply should be received.

Wednesday, July 15, 2015

Creating a custom Linux BSP for an ARM Cortex-A9 SBC with Yocto 1.8 - Part II

In the second part of this guide, the source code will be pulled, the build configuration will be customized, and the build will be executed.  Part II of this guide consists of the following sections.

  1. Pull the Freescale community BSP platform source code from github. 
  2. Setup the build environment using the predefined imx6dl-riotboard RioTboard (Internet of Things) machine.
  3. Create a new layer for the custom Linux distribution.
  4. Customize the image in the meta-bsec layer. 
  5. Create layer.conf file in the meta-bsec layer. 
  6. Create the distribution configuration file in the meta-bsec layer. 
  7. Add the new layer to bblayers.conf.
  8. Customize the local configuration.
  9. Execute
    the build.

1. Pull the Freescale community BSP platform source code from github.


Execute the following commands on the host.
 host]$ mkdir $HOME/bin  
host]$ curl https://storage.googleapis.com/git-repo-downloads/repo > ~/bin/repo
host]$ chmod a+x $HOME/bin/repo
host]$ echo "PATH=$PATH:$HOME/bin" >> $HOME/.bashrc
host]$ source .bashrc
host]$ mkdir -p $HOME/src/fsl-community-bsp
host]$ cd $HOME/src/fsl-community-bsp
host]$ repo init -u https://github.com/Freescale/fsl-community-bsp-platform -b fido
host]$ repo sync

2. Setup the build environment using the predefined imx6dl-riotboard machine.


Execute the following commands on the host.

 host]$ MACHINE=imx6dl-riotboard . ./setup-environment build  

3. Create a new layer for the custom Linux distribution


Execute the following commands on the host.

 host]$ cd $HOME/src/fsl-community-bsp/sources  
host]$ mkdir -p meta-bsec/conf/distro
host]$ mkdir -p meta-bsec/recipes-bsec/images
host]$ cd poky/meta/recipes-extended/images
host]$ cp core-image-full-cmdline.bb \
../../../../meta-bsec/recipes-bsec/images/bsec-image.bb

4. Customize the image in the meta-bsec layer.


Execute the following commands on the host.

  host]$ cd $HOME/src/fsl-community-bsp/sources/meta-bsec/recipes-bsec/images

Customize bsec-image.bb as follows.  Lines with bold text indicate lines to add to the file.

 DESCRIPTION = "A console-only image with more full-featured Linux system \
functionality installed."

# customize IMAGE_FEATURES as follows
IMAGE_FEATURES += "dev-pkgs tools-sdk tools-debug tools-profile tools-testapps \
debug-tweaks splash ssh-server-openssh package-management"

# packagegroup-core-tools-profile will build and install tracing and profiling tools to the target image.
# packagegroup-core-buildessential will build and install autotools, gcc, etc. to the target image.
# kernel-modules for install of the kernel modules.
# kernel-devsrc for building out of tree modules.
# IMAGE_ROOTFS_EXTRA_SPACE_append for adding extra space to the target rootfs image.

# customize IMAGE_INSTALL as follows
IMAGE_INSTALL = "\
packagegroup-core-boot \
packagegroup-core-full-cmdline \
packagegroup-core-tools-profile \
packagegroup-core-buildessential \
kernel-modules \
${CORE_IMAGE_EXTRA_INSTALL} \
kernel-devsrc \
"
inherit core-image

# Add extra space to the rootfs image
IMAGE_ROOTFS_EXTRA_SPACE_append += "+ 3000000"

5. Create layer.conf file in the meta-bsec layer.


Create sources/meta-bsec/conf/layer.conf with the below contents.

BBPATH .= ":${LAYERDIR}"  
BBFILES += "${LAYERDIR}/recipes-*/*/*.bb \
${LAYERDIR}/recipes-*/*/*.bbappend"
BBFILE_COLLECTIONS += "bsec"
BBFILE_PATTERN_bsec = "^${LAYERDIR}/"
BBFILE_PRIORITY_bsec = "6"


6. Create the distribution configuration file in the meta-bsec layer.


Create sources/meta-bsec/conf/disro/bsecdist.conf with the below contents.

 require conf/distro/poky.conf    
# distro name
DISTRO = "bsecdist"
DISTRO_NAME = "bsecdist distribution"
DISTRO_VERSION = "1.0"
DISTRO_CODENAME = "bsc"
DISTRO_FEATURES_append = " alsa usbhost usbgadget keyboard bluetooth"
SDK_VENDOR = "-bsecdistsdk"
SDK_VERSION := "${@'${DISTRO_VERSION}'.replace('snapshot-${DATE}','snapshot')}"
MAINTAINER = "bsecdist "
INHERIT += "buildhistory"
BUILDHISTORY_COMMIT = "1"

7. Add the new layer to bblayers.conf


Execute the following commands on the host.

 host]$ cd $HOME/src/fsl-community-bsp/build/conf

Customize bblayers.conf by adding the meta-bsec layer to BBLAYERS as follows.

 LCONF_VERSION = "6"

BBPATH = "${TOPDIR}"
BSPDIR := "${@os.path.abspath(os.path.dirname(d.getVar('FILE', True)) + '/../..')}"

BBFILES ?= ""
BBLAYERS = " \
${BSPDIR}/sources/poky/meta \
${BSPDIR}/sources/poky/meta-yocto \
\
${BSPDIR}/sources/meta-openembedded/meta-oe \
${BSPDIR}/sources/meta-openembedded/meta-multimedia \
\
${BSPDIR}/sources/meta-fsl-arm \
${BSPDIR}/sources/meta-fsl-arm-extra \
${BSPDIR}/sources/meta-fsl-demos \
${BSPDIR}/sources/meta-bsec \
"

8. Customize the local configuration


Customize local.conf as follows.

 MACHINE ??= 'imx6dl-riotboard'
# set distro name
DISTRO ?= 'bsecdist'
PACKAGE_CLASSES ?= "package_rpm package_deb"
EXTRA_IMAGE_FEATURES = " "
USER_CLASSES ?= "buildstats image-mklibs image-prelink"
PATCHRESOLVE = "noop"
BB_DISKMON_DIRS = "\
STOPTASKS,${TMPDIR},1G,100K \
STOPTASKS,${DL_DIR},1G,100K \
STOPTASKS,${SSTATE_DIR},1G,100K \
ABORT,${TMPDIR},100M,1K \
ABORT,${DL_DIR},100M,1K \
ABORT,${SSTATE_DIR},100M,1K"
PACKAGECONFIG_append_pn-qemu-native = " sdl"
PACKAGECONFIG_append_pn-nativesdk-qemu = " sdl"
ASSUME_PROVIDED += "libsdl-native"
CONF_VERSION = "1"
BB_NUMBER_THREADS = '4'
PARALLEL_MAKE = '-j 4'
DL_DIR ?= "${BSPDIR}/downloads/"
ACCEPT_FSL_EULA = "1"
# archive source code for all of the packages that will be built into the image
INHERIT += "archiver"
ARCHIVER_MODE[src] = "original"
# ensure that license files accompany each binary in final image
COPY_LIC_MANIFEST = "1"
COPY_LIC_DIRS = "1"
# setup source mirror
# make sure that bitbake checks for all of the source tarballs in a local directory
# before going to the Internet to fetch them.
SOURCE_MIRROR_URL ?= "file://${BSPDIR}/source-mirror/"
INHERIT += "own-mirrors"
# create a shareable cache of source code management backends
BB_GENERATE_MIRROR_TARBALLS = "1"

9. Execute the build


Execute the following commands on the host.

 host]$ cd $HOME/src/fsl-community-bsp/build 
host]$ time bitbake bsec-image

While the image is building, please take note of the following.

The input specifications for the GNU/Linux kernel and U-boot segments of the BSP are in the below files. These specifications include such things as GNU/Linux kernel patch files for i.MX 6 processor features, kernel boot args, kernel load address, cortex specific tuning parameters, etc.

 sources/meta-fsl-arm-extra/conf/machine/imx6dl-riotboard.conf  
sources/poky/meta-yocto/conf/distro/poky.conf
sources/meta-fsl-arm/recipes-kernel/linux/linux-imx.inc
sources/meta-fsl-arm/recipes-kernel/linux/linux-fslc_4_0.bb
sources/poky/meta/conf/machine/include/tune-cortexa9.inc

In part III of this guide, the image will be booted on the target and then audio will be tested, including recording and playback. Continue to part III of this guide.

Continue to Part III

Monday, July 13, 2015

Creating a custom Linux BSP for an ARM Cortex-A9 SBC with Yocto 1.8 - Part I


This guide is an update to "Creating a custom Linux distribution for an ARM® Cortex®-A9 based SBC" and provides directions for building a GNU/Linux BSP for the RioTboard (Internet of Things) with Yocto 1.8 on a 64-bit Fedora 21 GNU/Linux host.  The latest stable version of Yocto 1.8 has been incorporated along with build instructions for version 4.0.7 of the GNU/Linux kernel with i.MX 6 patches, U-boot, audio recording and playback support, and a full kernel and application development environment on the target.

This guide is split into three parts as follows.

I. Creating a custom Linux BSP for the RioTboard (Internet of Things) with Yocto 1.8- Part I
  1. Hardware and software prerequisites.
  2. Required Packages for a 64-bit Fedora 21 Host development system.

II. Creating a custom Linux BSP for the RioTboard with Yocto 1.8 - Part II

  1. Pull the Freescale community BSP platform source code from github. 
  2. Setup the build environment using the predefined imx6dl-riotboard machine.
  3. Create a new layer for the custom Linux distribution.
  4. Customize the image in the meta-bsec layer. 
  5. Create layer.conf file in the meta-bsec layer. 
  6. Create the distribution configuration file in the meta-bsec layer. 
  7. Add the new layer to bblayers.conf.
  8. Customize the local configuration.
  9. Execute the build.
III. Creating a custom Linux BSP for the RioTboard with Yocto 1.8 - Part III
  1. Write the GNU/Linux BSP image to an SD card.
  2. Set the physical switches on the RioTboard to boot from the uSD or SD card.
  3. Connect the target to the necessary peripherals for boot.
  4. Test audio recording, audio playback, and Internet connectivity.

The BSP will consist of a GNU/Linux 4.0.7 kernel, an EXT3 root filesystem, and the U-Boot bootloader.  All components will be compiled from the latest, public sources.  The GNU/Linux system will include support for audio recording and playback via the RioTboard's MIC In and Audio Out jacks. Support will be built for ethernet, ipv4, bluetooth, USB host and USB gadget, and an ssh server.  The final target image will also contain native ARM compilers, a full SDK, strace, GDB, package management tools, and the GNU/Linux 4.0.7 kernel source code with i.MX 6 patches already applied.

In the first guide for Yocto 1.7, a custom distribution and target image was created by extending the core-image-minimal image.  In this guide, a custom distribution and target image will be created by extending the core-image-full-cmdline image.  The resulting target image will be larger in size but will include a much richer set of features for kernel and application level development and debugging on the target.

Finally, Yocto will be configured so that all source packages are archived in their original format with accompanying license files.

To start with, please read Setting up an ARM® Cortex®-A9 based SBC which outlines the necessary components to get started.  A microphone and a set of powered speakers will be needed, both with 3.5mm connectors.  An Audio-Technica ATR4650 microphone and a pair of Logitech S-00134 powered speakers will be onnected to the RioTboard.  These will be needed for testing audio recording and playback.

1. Hardware and software prerequisites


Host Operating System

Fedora release 21 for x86_64
GNU/Linux kernel 4.0.7-200.fc21.x86_64 #1 SMP

Host Hardware

Intel(R) Core(TM) i7-4600U CPU @ 2.10GHz
Physical Memory 12 GB
My /home partition is 414 GB and resides on a solid state hard drive.


The Yocto build requires a large amount of space so it is recommend keeping a scratch area in the /home partition of at least 100 GB.

2. Required Packages for a 64-bit Fedora 21 Host development system


from the Yocto Project Mega Manual Revision 1.8

Execute the following commands on the host.

 host]$ sudo yum install gawk make wget tar bzip2 gzip python unzip perl patch \
diffutils diffstat git cpp gcc gcc-c++ glibc-devel texinfo chrpath \
ccache perl-Data-Dumper perl-Text-ParseWords perl-Thread-Queue socat \
findutils which
host]$ sudo yum install SDL-devel xterm perl-Thread-Queue
host]$ sudo yum install make docbook-style-dsssl docbook-style-xsl \
docbook-dtds docbook-utils fop libxslt dblatex xmlto xsltproc
host]$ sudo yum install autoconf automake libtool glib2-devel

In Part II, the  source code for the kernel, boot loader, and root file system packages will be pulled.  All components will then be built from source and the GNU/Linux BSP image will be created for the target.

Continue to Part II

Tuesday, December 30, 2014

Customizing a Linux distribution for an ARM Cortex-A9 SBC

The Yocto 1.7.1 (Dizzy branch) from Freescale source will be used for building a BSP for the i.MX 6 RIoTboard. The final image will consist of the following components

  • U-Boot version 2014.10 from the Freescale git repositories.
  • Linux kernel version 3.17.4 from the Freescale git repositories.
  • ext3 root filesystem with selected packages
The image will be built from the custom distribution (bsecdist) and custom image (bsec-image) defined in the last post. bsec-image is derived from core-image-minimal. The configuration changes below will add support for package tests to the baec-image. In addition, the profiling tools and static development libraries and header files will be added to the image. Finally, several standard userspace packages will be added to baec-image; namely, bison, flex, and and gunning. Last, several configuration directives will be added to the local configuration file so that source code archives, package versions, and accompanying license files are stored and cached in a local directory for future builds and compliance purposes.


1. Add profiling tools and static development packages to image

First, add the following profiling tools contained within the tools-profile package to the final image. Add static versions of the development packages to the target image. Therefore, add the IMAGE_FEATURES line to bsec-image.bb as follows.

sources/meta-bsec/recipes-bsec/images/bsec-image.bb should contain the following
SUMMARY = "A small image just capable of allowing a device to boot."
IMAGE_INSTALL = "packagegroup-core-boot ${ROOTFS_PKGMANAGE_BOOTSTRAP} ${CORE_IMAGE_EXTRA_INSTALL}"
IMAGE_LINGUAS = " "
LICENSE = "MIT"
inherit core-image
IMAGE_FEATURES += " tools-profile staticdev-pkgs"
IMAGE_ROOTFS_SIZE ?= "8192"


2. Add bison, flex, and gnupg packages to image

Now add bison, flex, and gnupg to the list of packages installed to the target image.
Add the following line to bsec-image.bb after the IMAGE_FEATURES line as follows.

sources/meta-bsec/recipes-bsec/images/bsec-image.bb should contain the following
SUMMARY = "A small image just capable of allowing a device to boot."
IMAGE_INSTALL = "packagegroup-core-boot ${ROOTFS_PKGMANAGE_BOOTSTRAP} ${CORE_IMAGE_EXTRA_INSTALL}"
IMAGE_LINGUAS = " "
LICENSE = "MIT"
inherit core-image
IMAGE_FEATURES += " tools-profile staticdev-pkgs"
CORE_IMAGE_EXTRA_INSTALL += "bison flex gnupg"
IMAGE_ROOTFS_SIZE ?= "8192"


3. List available packages

The full list of available packages can be viewed by executing the following command

$ bitbake -s

4. Setup source code archiving for all packages contained within image

Next, archive the source code for all packages contained within the image.
This can be achieved by adding the following two lines to the end of the build/conf/local.conf file

INHERIT += "archiver"
ARCHIVER_MODE[src] = "original"


5. Ensure license files are archived and included with binaries.

Subsequently, ensure that the license files accompany each binary in the final image by adding the following two lines to the end of the build/conf/local.conf file.

COPY_LIC_MANIFEST = "1"
COPY_LIC_DIRS = "1"

6. Add package testing to build

Now, add package testing to the build by adding the following two lines to bsec-image.bb

The contents of sources/meta-bsec/recipes-bsec/images/bsec-image.bb should be as follows
SUMMARY = "A small image just capable of allowing a device to boot."
IMAGE_INSTALL = "packagegroup-core-boot ${ROOTFS_PKGMANAGE_BOOTSTRAP} ${CORE_IMAGE_EXTRA_INSTALL}"
IMAGE_LINGUAS = " "
LICENSE = "MIT"
inherit core-image
IMAGE_FEATURES += " tools-profile staticdev-pkgs"
CORE_IMAGE_EXTRA_INSTALL += "bison flex gnupg"
DISTRO_FEATURES_append = " ptest"
EXTRA_IMAGE_FEATURES += "ptest-pkgs"

IMAGE_ROOTFS_SIZE ?= "8192"


7. Setup source code mirror so that package sources can be fetched from cache

Next, make sure that bitbake checks for all of the source tarballs in a local directory before going to the Internet to fetch them. This can be achieved by adding the following lines to the end of the build/conf/local.conf file.

SOURCE_MIRROR_URL ?= "file://${BSPDIR}/source-mirror/"
INHERIT += "own-mirrors"


8. Create shareable cache of git and svn backends

Finally, create a shareable cache of source code management backends by adding the following to the end of the build/conf/local.conf file.

BB_GENERATE_MIRROR_TARBALLS = “1”

After an initial build is performed, the directory contents of download/ can be recursively copied into source-mirror/ and the following line can be added to the end of the build/conf/local.conf file.

BB_NO_NETWORK = “1”

Consequently, all future builds will not fetch anything from the Internet and all package sources will be obtained from the sources in source-mirror.

9. Kick off the build

Kick off the build as follows

$ cd $HOME/src/fsl-community-bsp
$ MACHINE=imx6dl-riotboard . ./setup-environment build
$ bitbake bsec-image


10. Copy sources to mirror

Copy the sources from the downloads directory to source-mirror by executing the following commands

$ cd ..
$ cp -R downloads/*.* source-mirror/


After the build is complete, the license file for each package will be contained within the appropriately named subdirectory of build/tmp/deploy/licenses

The image manifest file build/tmp/deploy/images/imx6dl-riotboard/bsec-image-imx6dl-riotboard.manifest will contain a list of package names and associated versions for each of the packages in the image.


11. Boot the custom distribution image

After the build is complete, write the image to an SD Card as follows

$ cd build/tmp/deploy/images/imx6dl-riotboard
$ sudo umount /dev/sdX
$ sudo dd if=bsec-image-imx6dl-riotboard.sdcard of=/dev/sdb bs=1M
$ sudo sync


Insert the SD Card in the J6 SD Card slot on the bottom of the RiOTboard, connect the board to the Host over Serial UART, run minicom at 115200,8N1 from a terminal on the Host, and power on the board.

Monday, December 29, 2014

Creating a custom Linux distribution for an ARM Cortex-A9 SBC

The Yocto project provides an ideal platform for building a custom Linux distribution.  It's design was intended to model a machine.  The Yocto project or machine should take a number of inputs and produce an output.  The inputs to the machine are the specifications for the Linux distribution.  The output of the machine is the Linux distribution.


The Yocto project is the most widely supported system for building custom Linux distributions.
The Yocto project is very well supported by both communities and companies.  The project consists of a tool called bitbake and a build system that is based off of OpenEmbedded.  Together, these two components along with a defined set of metadata comprise what is called the Poky reference platform.

Yocto supports numerous architectures through OpenEmbedded. These include x86, ARM®, MIPS, and PowerPC.  Yocto's most attractive feature is its support of what are called layers.  Layers allow the abstraction of individual components or sets of components within a board support package (BSP). New layers can be derived from existing layers to enhance functionality, patch source code, or remove subsets of unneeded components.  

Building support for a custom boot loader, custom kernel, custom rootfs, and development application layer is both very clean and straightforward.  SELinux has become a necessary component of almost every Linux distribution.  It is very simple to integrate SELinux into Yocto via an OpenEmbedded layer.   Consequently, building a "Carrier Grade" Linux distribution for one of the many (several hundred) processors is attainable in a short amount of time.

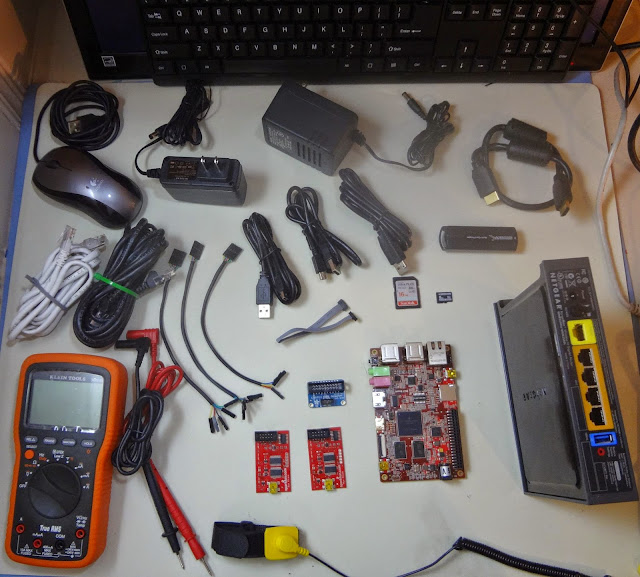
Embest Technology created the RIoTboard.  The board design is fairly simple.  The board contains an i.MX 6 Solo processor.  Embest Technology and Element 14 provide links to download prebuilt Linux and Android images.  Embest Technology also has a github repository where source code can be downloaded to build a complete BSP.  The complete BSP consists of the u-boot boot loader, kernel, and root filesystem.

Embest Technology took a snapshot of the Freescale Community BSP Platform source code repository at some point in the past.  The BSP source download from github, which consists of the Yocto layers for building a riotboard BSP, is not up to date with Freescale, Yocto, and OpenEmbedded.

Consequently, Freescale's community BSP platform will be used.  The platform is comprised of both the Poky reference build system and an additional series of layers which will allow us to build a custom Linux distribution for the i.MX 6 processor architecture.  

A custom Linux distribution that will be used for development should include support for only the peripheral components that will be used. The custom development distribution should be minimized to the maximum extent possible.  All I/O interfaces should be clearly documented.  Bootable media types should be documented and partition maps should be created.  These steps greatly ease development and debugging, and prevent unknown issues from cropping up after production release.  Layering in SELinux at a later time is simple.  Creating new layers for shared library development, or userspace application development is also simple and layers can be added for slicing out pieces of the kernel that aren't now, but may be needed later on.  Last but not least, blowing the appropriate fuses prior to production is critical.

To keep things simple, a new BSP or custom Linux distribution will be derived from the riotboard specifications that have already been incorporated into Freescale's community BSP platform.  

The goal here is to produce a minimal Linux distribution that can be used for development and easily extended from any level in the stack - u-boot, kernel, root filesystem, and userspace libraries or executables.  Most importantly, the architecture of this distribution will conform to the standards that have been outlined by the Yocto Project and OpenEmbedded.  This means anyone can easily pick up.

The input specifications for a generic i.MX 6 solo machine have been mostly documented in the meta-fsl-arm-extra layer.  The output image that is produced from these input specifications is an image that consists of the u-boot boot loader, i.MX 6 Solo/Dual kernel, and ext3 root filesystem.
In an effort to build a custom Linux distribution for the i.MX 6 Solo/Dual with the least amount of packages in the shortest amount of time, slimming down the input specifications, configuring the distribution, and naming it should only require modification of a few files.  Here are the steps.

First, the riotboard or target must be connected to the Fedora 20 x86_64 host via serial UART (see last blog post).  A card reader must be connected to the host via USB. 

The new distribution will be called the bsec distribution.  The bsec distribution will consist of a minimal Linux image, u-boot boot loader, and ext3 root filesystem configured for the i.MX 6 based riotboard.

Perform the following steps on the host.

1.  Pull the Freescale community BSP platform source code from github.  Dizzy is the Yocto 1.7.1 branch.   Execute the following commands on the host.

 $ mkdir $HOME/bin  
$ curl https://storage.googleapis.com/git-repo-downloads/repo > ~/bin/repo
$ chmod a+x $HOME/bin/repo
$ echo "PATH=$PATH:$HOME/bin" >> $HOME/.bashrc
$ source .bashrc
$ mkdir -p $HOME/src/fsl-community-bsp
$ cd $HOME/src/fsl-community-bsp
$ repo init -u https://github.com/Freescale/fsl-community-bsp-platform -b dizzy
$ repo sync

2.  Setup the build environment using the predefined imx6dl-riotboard machine.

 $ MACHINE=imx6dl-riotboard . ./setup-environment build  

3.  Create a new layer for the custom Linux distribution

 $ cd $HOME/src/fsl-community-bsp/sources  
$ mkdir -p meta-bsec/conf/distro
$ mkdir -p meta-bsec/recipes-bsec/images
$ cd poky/meta/recipes-core/images
$ cp core-image-minimal.bb ../../../../meta-bsec/recipes-bsec/images/bsec-image.bb

4.  Create the layer.conf file in the meta-bsec layer. 

sources/meta-bsec/conf/layer.conf should contain the following
 BBPATH .= ":${LAYERDIR}"  
BBFILES += "${LAYERDIR}/recipes-*/*/*.bb \
${LAYERDIR}/recipes-*/*/*.bbappend"
BBFILE_COLLECTIONS += "bsec"
BBFILE_PATTERN_bsec = "^${LAYERDIR}/"
BBFILE_PRIORITY_bsec = "6"

5.  Create the distribution configuration file in the meta-bsec layer. 

sources/meta-bsec/conf/distro/bsecdist.conf should contain the following
 require conf/distro/poky.conf  
DISTRO = "bsecdist"
DISTRO_NAME = "bsecdist distribution"
DISTRO_VERSION = "1.0"
DISTRO_CODENAME = "bsc"
SDK_VENDOR = "-bsecdistsdk"
SDK_VERSION := "${@'${DISTRO_VERSION}'.replace('snapshot-${DATE}','snapshot')}"
MAINTAINER = "bsecdist <e-mail-address>"
INHERIT += "buildhistory"
BUILDHISTORY_COMMIT = "1"

6.  Added the new layer to bblayers.conf

build/conf/bblayers.conf should contain the following
 LCONF_VERSION = "6"  
BBPATH = "${TOPDIR}"
BSPDIR := "${@os.path.abspath(os.path.dirname(d.getVar('FILE', True)) + '/../..')}"
BBFILES ?= ""
BBLAYERS = " \
${BSPDIR}/sources/poky/meta \
${BSPDIR}/sources/poky/meta-yocto \
\
${BSPDIR}/sources/meta-openembedded/meta-oe \
${BSPDIR}/sources/meta-openembedded/meta-multimedia \
\
${BSPDIR}/sources/meta-fsl-arm \
${BSPDIR}/sources/meta-fsl-arm-extra \
${BSPDIR}/sources/meta-fsl-demos \
${BSPDIR}/sources/poky/meta-selinux \
${BSPDIR}/sources/meta-bsec \
"

7.  Set the distribution to the bsec distribution in local.conf

build/conf/local.conf should contain the following
 MACHINE ??= 'imx6dl-riotboard'  
DISTRO ?= 'bsecdist'
PACKAGE_CLASSES ?= "package_rpm"
EXTRA_IMAGE_FEATURES = "debug-tweaks"
USER_CLASSES ?= "buildstats image-mklibs image-prelink"
PATCHRESOLVE = "noop"
BB_DISKMON_DIRS = "\
STOPTASKS,${TMPDIR},1G,100K \
STOPTASKS,${DL_DIR},1G,100K \
STOPTASKS,${SSTATE_DIR},1G,100K \
ABORT,${TMPDIR},100M,1K \
ABORT,${DL_DIR},100M,1K \
ABORT,${SSTATE_DIR},100M,1K"
PACKAGECONFIG_append_pn-qemu-native = " sdl"
PACKAGECONFIG_append_pn-nativesdk-qemu = " sdl"
ASSUME_PROVIDED += "libsdl-native"
CONF_VERSION = "1"
BB_NUMBER_THREADS = '1'
PARALLEL_MAKE = '-j 1'
DL_DIR ?= "${BSPDIR}/downloads/"
ACCEPT_FSL_EULA = "1"

8.  Pull the OpenEmbedded SELinux meta layer for later configuration

 $ cd sources/poky   
$ git clone -b dizzy git://git.yoctoproject.org/meta-selinux
$ cd ../..

9.  Perform the build

 $ cd build  
$ bitbake bsec-image

10.  Write the image to the SD card

 $ cd tmp/deploy/images/imx6dl-riotboard  
$ sudo dd if=bsec-image-imx6dl-riotboard.sdcard of=/dev/sdX bs=1M
$ sudo sync

At this point, the jumpers on the riotboard should be set to boot from the SD card.  Next, power on the riotboard with the new SD card.  If HDMI is connected,  the Das u-boot software engineering logo should appear on the display.

 bsecdist distribution 1.0 imx6dl-riotboard /dev/ttymxc1               
imx6dl-riotboard login:

Review the input specifications for the riotboard machine should be simple.  Start with the following files

 sources/meta-fsl-arm-extra/conf/machine/imx6dl-riotboard.conf  
sources/poky/meta-yocto/conf/distro/poky.conf
sources/meta-fsl-arm/recipes-kernel/linux/linux-imx.inc
sources/meta-fsl-arm/recipes-kernel/linux/linux-fslc_3.17.bb
sources/poky/meta/conf/machine/include/tune-cortexa9.inc

The input specifications for this image are raw and generic. They define software support for ALL of the on-board peripherals with the e-fuses left open.

Finally, the output image was 29 MB and is comprised of the u-boot boot loader, the Linux kernel, and the root file system.  This is a decent place to start before adding more software to the BSP.

Tuesday, December 23, 2014

Setting up an ARM Cortex®-A9 based SBC

The RiOTboard - an ARM Cortex-A9 based SBC


The RIoTboard is an ARM Cortex-A9 based single board computer (SBC). The RIoTboard has a Freescale i.MX6 Solo application processor and an integrated Freescale Kinetis MCU for additional debugging and development. The i.MX6 Solo supports the single ARM Cortex-A9 MPCore Platform. The i.MX6 Solo contains ARM TrustZone technology and the i.MX 6 SoC on the RIoTboard has a 96 KB Boot Rom with support for high assurance boot. Other features of the board include 1 GB of DDR3 memory, 4 GB eMMC, JTAG, Serial, mini USB for OpenSDA, mini USB for USB OTG, LVDS, parallel RGB expansion, 4 USB-A ports, HDMI, audio, reset button, microSD card slot, SD card slot, and boot onboard boot switches. The board is very reasonably priced. Last but not least, the Freescale i.MX 6 ARM Cortex-A9 application processor has ARM TrustZone technology.

The i.MX6 Solo processor on the RIoTboard is labeled MCIMX6S8DVM10AB. According to the i.MX6 Solo data sheet, the processor supports a number of security related features. The list includes ARM TrustZone technology with TZ architecture support, a secure JTAG controller for locking down and protecting the JTAG port, a cryptographic acceleration and assurance module with secure RAM and a true PRNG, a central security unit (CSU) including secure non-volatile storage, high assurance boot, and the separation of memory and interrupts between secure world and normal world. There are more security related features but this is a general list.

Setting up a RIoTboard

Embedded devices used for development purposes often have network controllers on them.  From mobile phones to radios, routers, watches, and wearables, these devices are sending and receiving IP datagrams to external Internet hosts via one or many of their network interfaces; WiFi, 3G, 4G, and Bluetooth.  Most of the processors being sold today can run rich operating systems with full software support for multiple network interface controllers.  In addition, many of the processors being sold today contain support for both virtualization and trusted execution. 

A network router that is isolated from the Internet and any local computers can be connected to the embedded device via the device's primary network interface. If there are multiple network interfaces on the embedded device, then multiple routers can be connected to the embedded device - one for each interface type. 3G and 4G routers, while not widely available, can be connected to the 3G or 4G modem on the embedded device.

IP traffic can be sent and received from both secure world and normal world via multiple network interfaces.  Raw packet analysis tools on the router can be used to inspect incoming and outgoing traffic from the embedded device.  After the router is connected to the embedded device, data that is transmitted over the embedded device's network interface can be recorded to a format such as PCAP and saved for later analysis.  A firewall can also be deployed on the router and all outgoing traffic originating from the embedded device can be blocked.  Inexpensive routers with ARM based processors and ARM TrustZone technology can be purchased from most retail stores.

Short of having access to JTAG hardware debuggers, a Bus Pirate can be used in conjunction with OpenOCD for debugging the i.MX 6 processor on the RiOTboard. A bus pirate can also be used in transparent UART bridge mode for connecting the host to the target (the RiOTboard).

This type of setup can be very useful for debugging embedded devices, analyzing embedded devices, developing software for embedded devices, and testing embedded devices prior to production.


The Netgear WNR3500U (right) can run multiple operating systems.


  • Digital multimeter for testing continuity of JTAG, SWD, and Serial cables
  • Proper ground and wrist strap
  • 2x ethernet cable
  • WNR3500U router
  • microSD card 8 GB Class I
  • SD card 8 GB Class I
  • RiOTboard
  • 5 VDC power supply for RiOTboard
  • 2x Bus Pirate
  • Cortex SWD 10 to 20 pin adapter
  • 2x 5-pin female to female breakout cable
  • FTDI mini USB to 5-pin female breakout board
  • 4-pin female to female breakout cable
  • HDMI cable
  • USB mouse
  • USB keyboard
  • Display
  • Host computer with Linux (Fedora 21)
  • 4x mini USB to USB-A cables
  • 10-pin female to female SWD / JTAG cable
  • Card reader

Using the Bus Pirate as a transparent UART bridge

Bus Pirate Pin 01 GND  <---> RiOTboard J18 Pin 3 GND
Bus Pirate Pin 08 MOSI <---> RiOTboard J18 Pin 1 UART2 TX
Bus Pirate Pin 10 MISO <---> RiOTboard J18 Pin 2 UART2 RX

Flashing the PIC on the Bus Pirate is straightforward (see documentation) and should be performed so that the Bus Pirate is running the latest firmware.

RiOTboard connected via JTAG and UART to Host